Thursday, November 21, 2013

Thief Thursday, Peppermint Sugar Scrub


Over the weekend, I decided to make some sugar scrub to go in some pedicure gift boxes I'm making for my Etsy shop. I bought all pink things for my first set, and thought "What better than some peppermint scented sugar scrub to complete the gift?!" So, Isearch recipe on Pinterest and came up on this (and, of course, modified it to fit my liking). 


Ingredients Needed:
 - 1/4 cup Granulated Sugar
- 2 Tbsp Epsom Salt
- 2 Tbsp Olive Oil (Wish I had Coconut Oil instead right now)
- 3-5 drops Peppermint Oil
- Coloring (optional)

You also need:
- Bowl/Spoon for mixing
- Another small bowl and spoon if you color some
- Storage Container (Baby food jar in picture, but I decided on something different later)


Mix the sugar and salt together first in the bowl. Then, add the oils. If you don't want color is yours, you are now done. Pretty simple, right? Imagine what you would have paid for that in a store...

If you decide to color yours, just separate your sugar scrub in half, add a few drops of color to 1/2, and mix. Add more drops, if desired. I made mine more pinkish to match the gift box.

Then, just layer by the spoonful and pack in (so they don't mix later) a container that can the tightly sealed. Sitting out, the scrub is supposed to be good for at least 2 months. I recommend refrigerating yours if you know you aren't going to use it daily or several times a week


Monday, November 18, 2013

Time: Slow Down!

Holy cow! How is it already the middle of November? I feel like just last week was June! It seems like the time passes SOOO slowly when you're a kid, but when you're grown it goes way too fast. I, mean, seriously - my baby is due any time now and I've barely even come to terms that I'm going to be a mommy again! And I still have Halloween decorations out (not put up, but not put away either), but I saw a sign that said "39 more days until Christmas!" over the weekend. Not to mention the Salvation Army Bell Ringers made their appearance at the store doors Saturday.

Kind of subject here, but while I was in town this weekend I looked at birthday cards (today is one of my brother's birthday), and I was astounded at the price! $3 to $8 for a card that says "Happy Birthday" with something sentimental or funny on the inside that somebody else wrote. Outrageous! [All I could think was "Apparently, I'm in the wrong industry. I'll make my own and sell them for half that price! Still get rich."] Usually, we go to the Dollar Tree and buy their $1 ones or even the 2/$1 cards and save one for somebody else. But, there isn't anything actually personal about any of those either. So, I had The Diva make one! It's so much cuter, sweeter, and is more likely to end up on the fridge than in the trash.
Speaking of The Diva,  she decided on Friday that she wanted cookie cake for dessert after dinner. So, below are two pictures of her adorable little self helping mix ingredients.


Spoiled rotten, isn't she?  I made the apron she's wearing in the second picture for her before we moved and that was her first time wearing it. She was so excited! I would share the cookie cake recipe with y'all, but I was not impressed. I need somebody from Walmart to spill the beans on how they make theirs! *Hint, hint*  It's my favorite kind of cake and I even get one every year for my birthday! Yum yum!

Oh! The husband brought home a new... dog! Yep, we now have two dogs, two gerbils, and (soon to be) two kids. Apparently everything comes in pairs around here! He was in need of a new home because his owner had to get rid of him before he moved (no dogs allowed). My Husband works with the guy and couldn't say no when asked to take him. Aw - my big ole softie! So, here's a picture of our 2 boys after bath:

Hercules, 1 year

King, 9 months (And hard to get a picture of)

Hey, I set up a Facebook account for my Etsy shop this weekend! Check it out and please like it! I need 30 likes to be able to personalize it! 

Thursday, November 14, 2013

Thief Thursday, Bath Bombs


Well, with no job and no way to personally pay for Christmas presents like I'm used to doing, I decided to turn to Google and Pinterest for homemade ideas. I actually found some really amazing ideas, one of which was homemade soap. I've always wanted to try making my own, but never remember to buy glycerin when I'm at a specialty store. Maybe I'll remember one day. Maybe.

Anyway, it reminded me of what I buy my mother in law every year: a gift box from Lush. If you never heard of them before, click on the link. They're located all over the world and are absolutely amazing! Only problem? The price. Seriously? $4.95 PLUS tax (and shipping if you don't live close - like us) for a bath bomb?! I'm a mom! I do NOT have the money to pay $5 for a fun bath every time I want it or have a stressful day. Solution? Make my own! That way, I can even make smaller ones so I don't feel so wasteful and they last longer.

I found two favorable recipes:
1.) XO Vain
2.) Maria's Self

I wasn't sure which one I liked more, so I combined them both to make my own. I made a very small batch so that I could try it out without risking wasting too much of it if it fails (Chemistry is not my strong suit). Here goes:
Note: my supplies and cost is only for the amount I made, which was very tiny. The more you make the more ingredients you will need to purchase and more money will spend.

In a small bowl, mix together:
-1 Tbsp Epsom salt ( $0.88+ at Walmart)
- 1 Tbsp Citric Acid ($3.97+ at Walmart)
- 1/2 Tbsp Cornstarch ($0.96+ at Walmart)
- 2 Tbsp Baking Soda ($0.54+ at Walmart)
(I will post amounts needed for a larger batch at the end of the post)


In a small container, combine:
- 2 tsp Olive Oil ($3.98+ at Walmart)
- 2-3 Drops Essential Oil (Optional; I paid $5.95 here.)


Slowly drizzle liquid mixture on top dry ingredients. 

Mix together.

In a spray bottle, add some water and a few drops of coloring (optional - I bought mine here). You don't want to use food coloring, as it may stain your tub. I DEFINITELY recommend using small, travel-size spray bottles instead of big ones, but I can't find mine. We didn't use any color in this batch, except for a few drops added to hers later for green, and some in the middle of one of mine. 

Slowly spray/mix in water until you get a chunky consistency that is crumbly, but moldable and still looks dry. We didn't do more than 2 sprays at a time because our mixture began to fizz and we didn't want that to happen too much before we got them into the bath tub! 


Then, stuff mixture into molds (I cut a small ornament in half and we stuffed both sides and put it together, and I filled a heart cookie cutter) and set out on wax paper. Let set forever. Okay, so it's only 24-48 hours, but it feels like forever!

Touch gently to make sure they are dry and hard all the way through. Then, have fun in the tub! We stored ours inside of the plastic bag. They should stay good for a while, but make sure to store them in an airtight container of some sort. 


Here's the recipe for a larger batch:
- 2 cups Epsom Salt
- 2 cups Citric Acid
- 4 cups Baking Soda
- 3/4 cup Cornstarch
- 1/4 cup Olive Oil
- 10-15 drops Essential Oil

Here's a picture of mine in action. Ah... So relaxing!  I cannot wait to make more of these and give them out at Christmas time, along with several other homemade bath products I've made this week! 

P.S.- Here is where I bought my color.


I'm now on Bloglovin'! Make sure to follow me! 

Monday, November 11, 2013

Save Money: Foam Soap

Over the weekend we ran out of our beloved foam hand soap. Usually, I have a spare in the cabinet, but I decided to quit paying the almost $6.00 for one bottle to last a few weeks. Sorry, but I'm too broke for that. Not to mention my skin is too sensitive for other soaps; trust me, I've tried Softsoap, Dove, and so many others. 

Anyway, a super simple way I learned I can still have foaming Bath & Body Works soap without paying a bunch of money every time?  Pay it one time! Well, it's $11.50 a few times a year, but that's still a better price than $5.50 one to two times a month. AND if I were to hit one of the big sales or but out-of-season soaps? My head just exploded with the amount of money I would save! 

Here's the secret:
You need an empty foam soap dispenser and your favorite smelling body wash (or shower gel).

1.) Pour some body soap into the empty container, until it's about 1/5 full. 

2.) Add water to the foam container, until it's about 3/4 full (otherwise, you'll have some spill over the top when you put the lid on). 

3.) Shake up the soap/water mixture until the soap is well dispersed.  

4.)Throw away (or put away, if you didn't use all of it) your bottle of body wash. Aw, I HATE when I use all of my BBW up. 

5.) Display your soap for all to see/use/smell!
The best part is that you can change it up every time you get tired of using the same sent - without paying a fortune! I really want to try buying a milder scent next time and using essential oils for scents. Then, I could really switch it up season! Mmm... peppermint in a couple weeks for Christmas! Also, I'd like to get the trial sizes when they are on sale. Bet those puppies would work like magic!

Wanna know another secret? You can use this for any kind of soap. Not just hand soap. I also use this method in the kitchen for dish soap while washing dishes! Anybody have any tips or tricks they used to help save money when it comes to soap? I'd love to hear them!

Wednesday, November 6, 2013

Exciting Upcoming Posts...

Oh, man! I have some great ideas for the upcoming weeks, y'all! Mainly in preparation for Christmas, but I need to get this stuff done before the baby comes or I'll be running around like a chicken with my head cut off! And we don't want that.

Here are a few of my upcoming projects (not necessarily in order):
1.) DIY Lush Bath Bombs
2.) DIY Stocking Hanger
3.) DIY Puppy Dog Treats
4.) DIY Sugar Body Scrub
5.) DIY Tree Skirt

Like I said: mainly Christmas stuff. But, in all honesty, it's not that far away. I have a few other projects I'm working on that I hope to be able to throw in there, too.

Oh, and here is something else exciting: I will be doing a giveaway next month! Nothing super spectacular, but if you're like me and LOVE anything free, make sure to be watching out for it. Potential running dates are December 1st-15th, so that I can get it sent off before Christmas. I'm so excited!

Monday, November 4, 2013

DIY Onesie Name Banner for Baby Shower

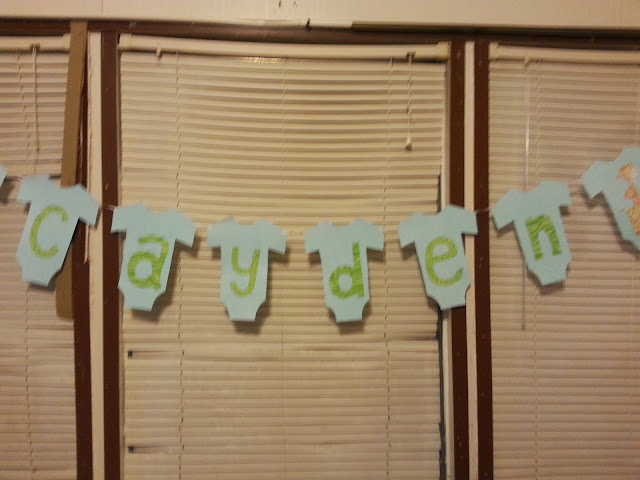
The onesie name banner turned out absolutely perfect. It was the most time consuming, but definitely worth it. I just wish I had taken better pictures of it. Learned my lesson there. 

Materials Needed:
- Cardstock
- Pencil
- Scissors
- Scrapbook paper or paper with prints
- Yarn or string 
- Hole punch
-Tape
- Glue/Spray Adhesive 
-Tissue paper - if using white cardstock
- Animals or matching decorations for the plain onesies (optional)
- Copier - optional

I began by making my onesie template, cutting it out, and then tracing it onto my other cardstock papers. I knew I needed 6 for just his name, and I wanted another 6 for the extras on the sides. So... I cheated and made copies instead of drawing the onesie on each paper.  [Hey, at least I'm honest about my laziness! ]


Next, I sprayed a onesie with spray adhesive and I laid a pre-cut piece of blue tissue paper on top of it. I like the wrinkled look, so I didn't even try to get rid of them. However, I can almost guarantee that using glue instead of spray adhesive would work better if you want a smooth look. Or, just use colored cardstock. I had only plain white and saw no reason to spend money on colored kind. 


Trim them up and make them nice and pretty. 

I cheated on these a little bit, too. Scrapbook paper is extremely expensive, and the last thing I wanted to do was use all of my green leopard and zebra for this project. So, I ran a copy of the paper on plain white printer paper. Then, I drew my letters on the paper and was excited to find out I could do two letters per sheet.
Note: I did every other letter the same print. 


Cut and paste your letters. I didn't worry too much about my letters being perfect, since thebanner would be hanging up and nobody was judging it. However, if you're a perfectionist, have fun! 

Punch your holes and put your hanging string through (starting with the plain ones). I recommend putting a piece of tape on the back of each onesie, so that they don't all slide to the middle when you put it up.

Then, you can be done or glue decorations onto the plain onesies like I did to match the theme (copied off onto cardstock and cut out, of course).

Again, sorry for the cruddy photos and backgrounds, but you gotta use what you can when everything's at the new place, right? 

That's the last of my baby shower projects. We'll soon get to start on something new! Just have to choose what...

Friday, November 1, 2013

DIY Cupcake Picks

Thesevcupcake picks were definitely the easiest decorations I made for the baby shower.

Materials Needed:
-Topping design/characters
-Copier/Cardstock or lots of the chosen design/characters
-Hot Glue/Gun
-Toothpicks
-Scissors

I bought a Safari themed baby shower hanging decoration set from Hobby Lobby for $1.99.
Hobby Lobby, also, had cupcake picks, but it was 24/$1.99 and I needed 30. I already had the larger hanging decorations to use for the walls, so I figured I may as well use them for the picks so it all correlates. I stuck the animals in my copy machine, set the sizing to "Custom" -> "35%" and printed (AND saved money). I was able to get (with quite a bit of work/placing) all on one page. You can see that there is a HUGE difference in sizing compared to the original!
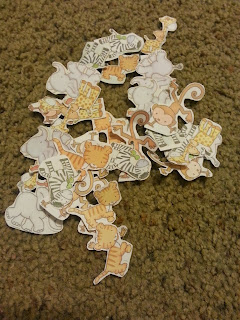
I cut out all 35 of my animals (I did a few extra, just in case).

One-by-one, I just added a small glob of hot glue and then a toothpick. Make sure to let the glue dry all the way, or else you'll have a big mess.


All done! I did half on green toothpicks and half on blue. They turned out pretty well. Not the cutest part of the baby shower, but nobody really pays a whole lot of attention to what's on top of the dessert anyway - it's just a tiny obstacle that must be removed to get to the yummy part. At least they matched the other decorations, though!

I probably won't do another post until Monday. Have a great weekend!