Showing posts with label shower. Show all posts

Monday, November 4, 2013

DIY Onesie Name Banner for Baby Shower

The onesie name banner turned out absolutely perfect. It was the most time consuming, but definitely worth it. I just wish I had taken better pictures of it. Learned my lesson there. 

Materials Needed:
- Cardstock
- Pencil
- Scissors
- Scrapbook paper or paper with prints
- Yarn or string 
- Hole punch
-Tape
- Glue/Spray Adhesive 
-Tissue paper - if using white cardstock
- Animals or matching decorations for the plain onesies (optional)
- Copier - optional

I began by making my onesie template, cutting it out, and then tracing it onto my other cardstock papers. I knew I needed 6 for just his name, and I wanted another 6 for the extras on the sides. So... I cheated and made copies instead of drawing the onesie on each paper.  [Hey, at least I'm honest about my laziness! ]


Next, I sprayed a onesie with spray adhesive and I laid a pre-cut piece of blue tissue paper on top of it. I like the wrinkled look, so I didn't even try to get rid of them. However, I can almost guarantee that using glue instead of spray adhesive would work better if you want a smooth look. Or, just use colored cardstock. I had only plain white and saw no reason to spend money on colored kind. 


Trim them up and make them nice and pretty. 

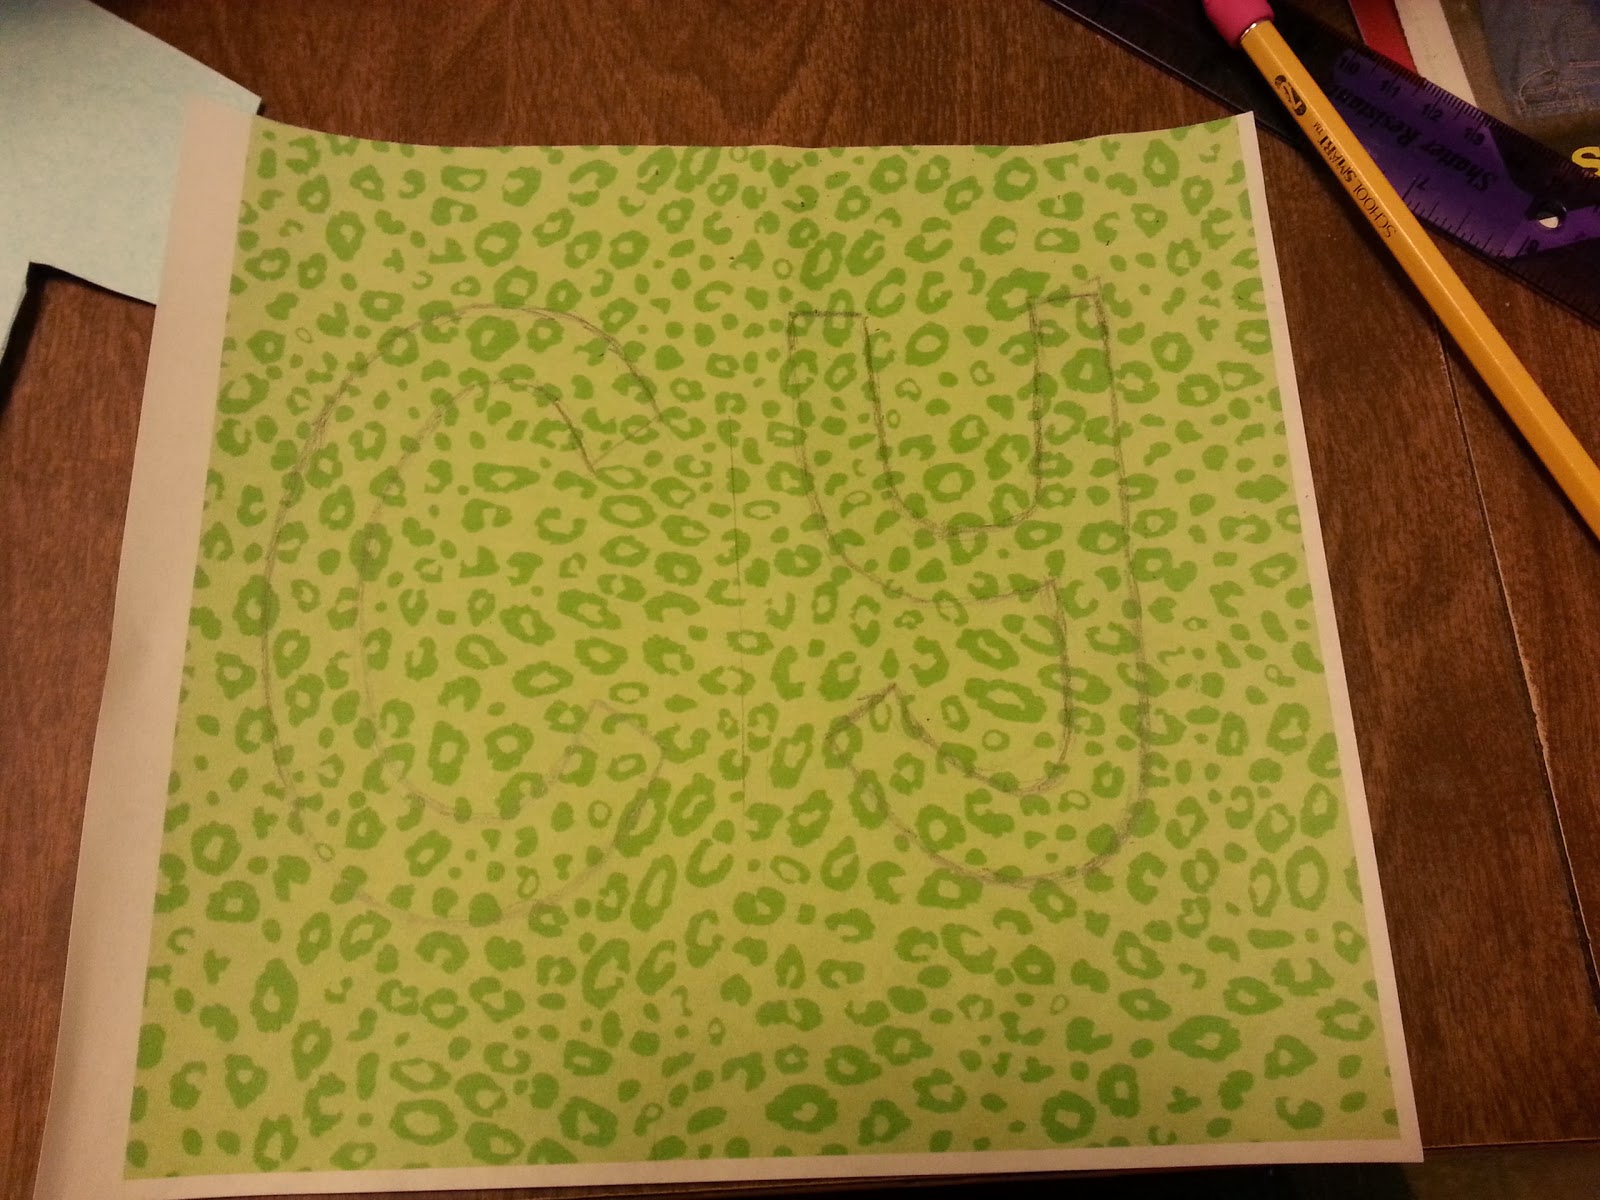
I cheated on these a little bit, too. Scrapbook paper is extremely expensive, and the last thing I wanted to do was use all of my green leopard and zebra for this project. So, I ran a copy of the paper on plain white printer paper. Then, I drew my letters on the paper and was excited to find out I could do two letters per sheet.
Note: I did every other letter the same print. 


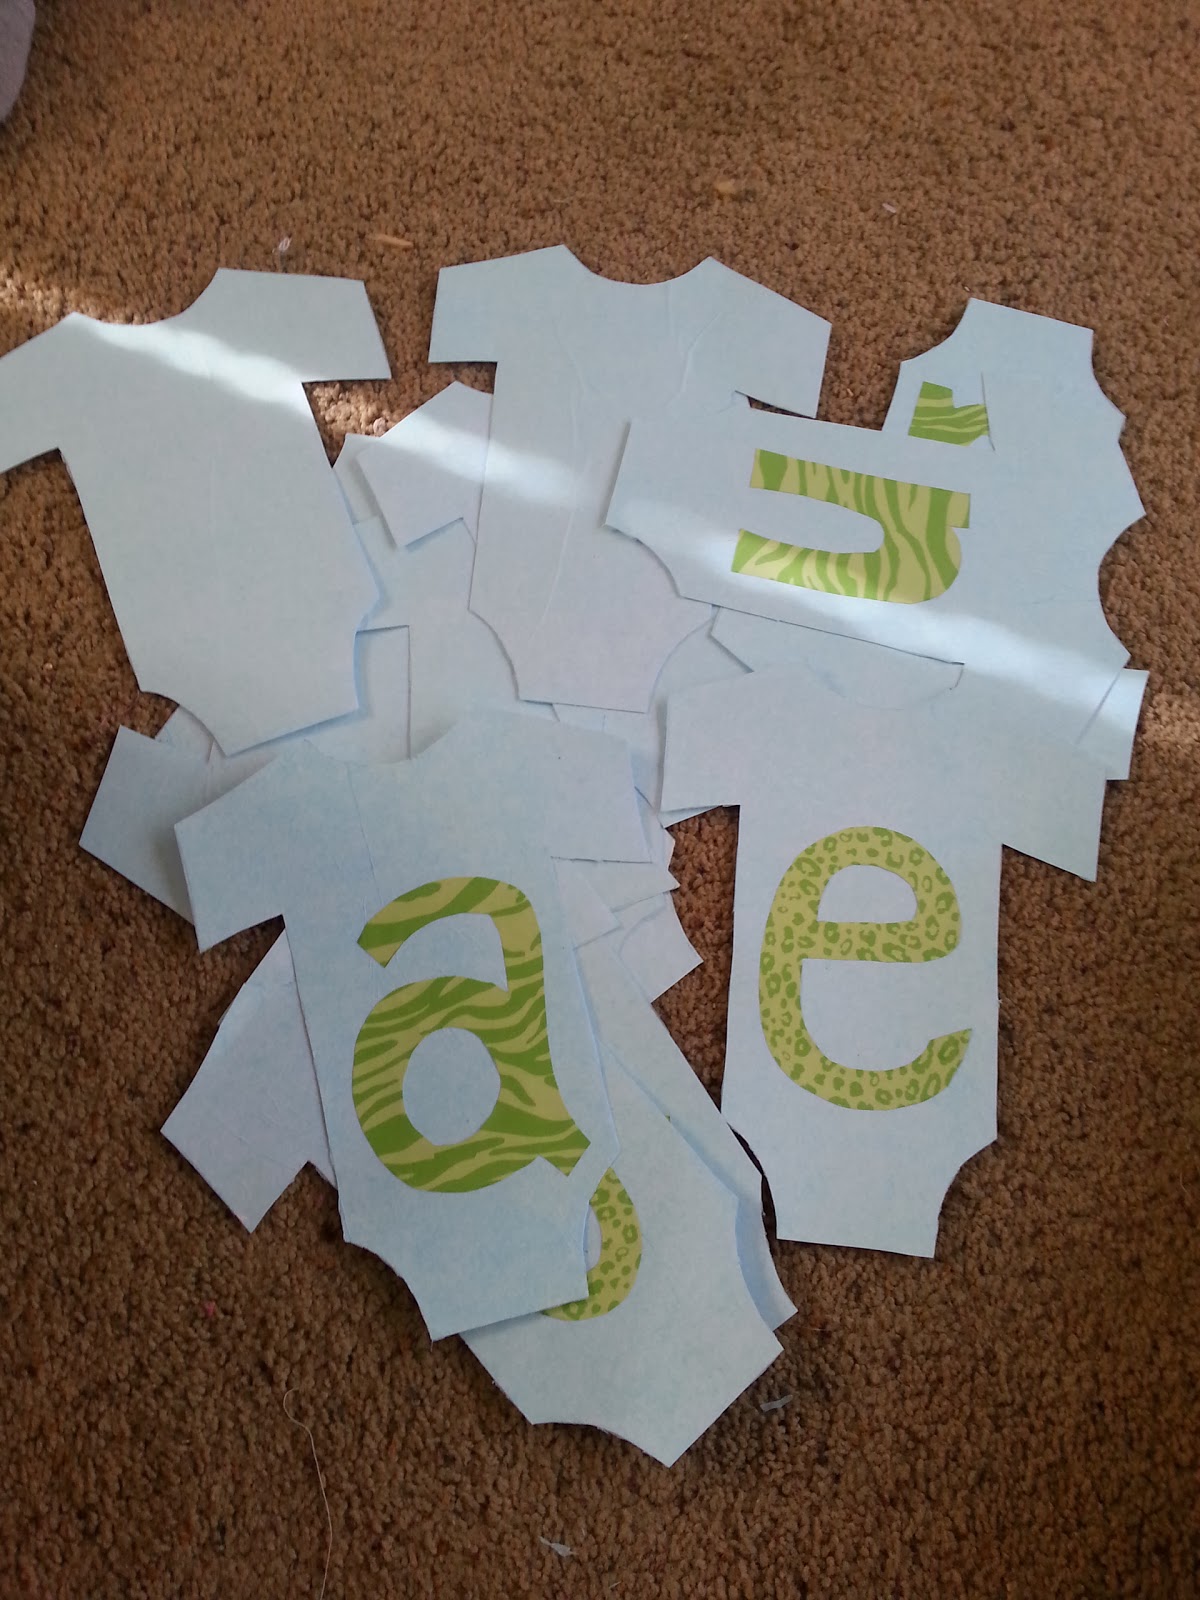
Cut and paste your letters. I didn't worry too much about my letters being perfect, since thebanner would be hanging up and nobody was judging it. However, if you're a perfectionist, have fun! 

Punch your holes and put your hanging string through (starting with the plain ones). I recommend putting a piece of tape on the back of each onesie, so that they don't all slide to the middle when you put it up.

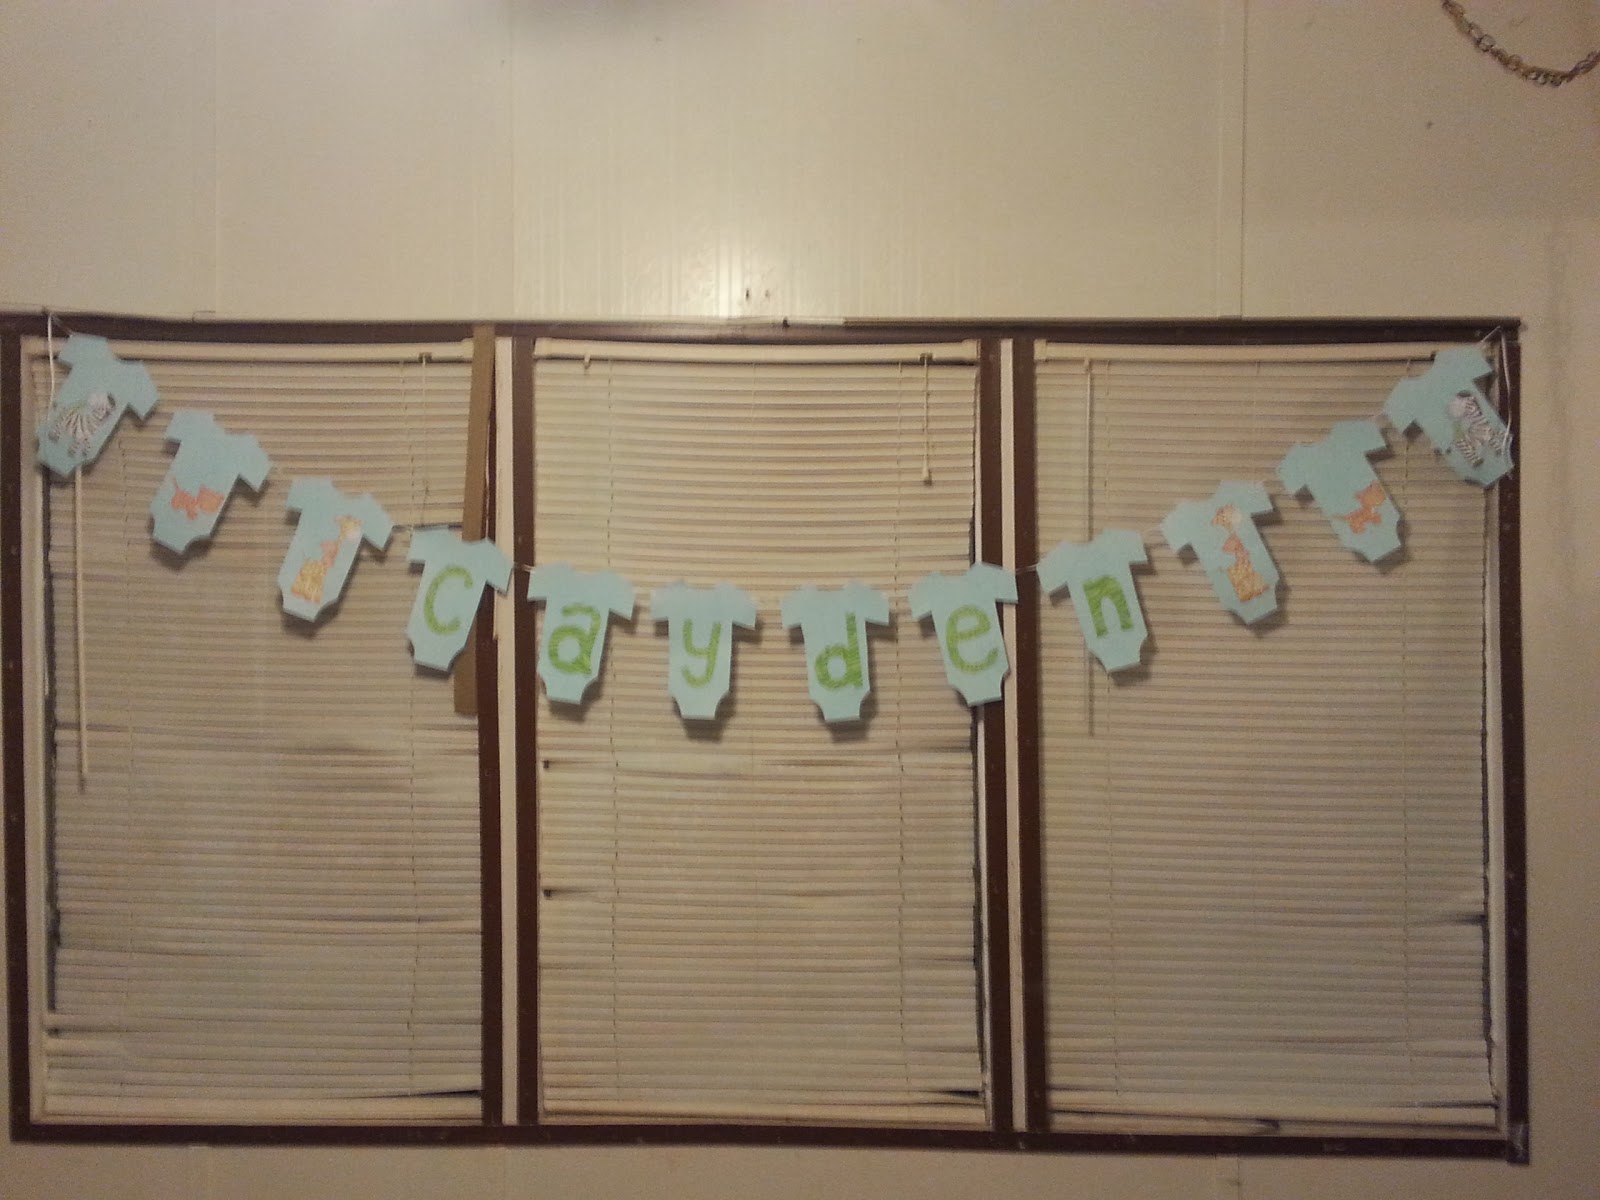
Then, you can be done or glue decorations onto the plain onesies like I did to match the theme (copied off onto cardstock and cut out, of course).

Again, sorry for the cruddy photos and backgrounds, but you gotta use what you can when everything's at the new place, right? 

That's the last of my baby shower projects. We'll soon get to start on something new! Just have to choose what...

Friday, November 1, 2013

DIY Cupcake Picks

Thesevcupcake picks were definitely the easiest decorations I made for the baby shower.

Materials Needed:
-Topping design/characters
-Copier/Cardstock or lots of the chosen design/characters
-Hot Glue/Gun
-Toothpicks
-Scissors

I bought a Safari themed baby shower hanging decoration set from Hobby Lobby for $1.99.
Hobby Lobby, also, had cupcake picks, but it was 24/$1.99 and I needed 30. I already had the larger hanging decorations to use for the walls, so I figured I may as well use them for the picks so it all correlates. I stuck the animals in my copy machine, set the sizing to "Custom" -> "35%" and printed (AND saved money). I was able to get (with quite a bit of work/placing) all on one page. You can see that there is a HUGE difference in sizing compared to the original!

I cut out all 35 of my animals (I did a few extra, just in case).

One-by-one, I just added a small glob of hot glue and then a toothpick. Make sure to let the glue dry all the way, or else you'll have a big mess.


All done! I did half on green toothpicks and half on blue. They turned out pretty well. Not the cutest part of the baby shower, but nobody really pays a whole lot of attention to what's on top of the dessert anyway - it's just a tiny obstacle that must be removed to get to the yummy part. At least they matched the other decorations, though!

I probably won't do another post until Monday. Have a great weekend!

Wednesday, October 30, 2013

DIY Baby Shower Corsage


Like I said yesterday, today is the ribbon corsage - my favorite piece I made for the shower. Since I already had all of the ribbon (just a matter of going through my boxes to find coordinating colors), I didn't have to spend any money on this project. Yay! 

Materials Needed:
-Ribbon in coordinating colors
-Scissors
-Hot Glue/Gun
-Cardboard Circle (I used one side of a ribbon spool)
-Something to stop fraying ends
-Embellishment
-Safety Pin

Here's a picture of all of my ribbon and my cardboard circle. The smaller pieces of ribbon are 4" and the longer pieces (on the bottom left) are 6". I, actually, did not use all of 
the ribbon I cut, but better safe than sorry. 

Fold the smaller pieces of ribbon almost all of the way in half, leaving just enough room to put hot glue on both ends. Then, place on your cardboard circle. Sorry, I don't have a pifture of that step, but you can tell what I mean from the next picture.

After you glue down the smaller pieces of ribbon, you get to start on your larger pieces. I used a wood burning tool to cut my ends so they wouldn't fray, but you can carefully use scissors and a lighter. 

Simply glue down your longer pieces of ribbon in the order you want them in.

Lastly, glue down your safety pin.

Oops! And glue on any embellishments.

Personally, I think it's adorable! Down south, we had corsages for just about everything. And I mean big, gaudy corsages! Up here, nada. So weird! 


Tuesday, October 29, 2013

Baby Shower Centerpiece, Safari Theme

Last weekend was my best friend's baby shower, and her sister and I are putting it on for her. Since I like to not spend money wherever possible, I decided to make decorations using items I already had at home or could get really cheap (God bless the Dollar Tree!).
The theme is Safari, which is so adorable to me. I have several other things I'm working on for her baby shower that I'll be showing off over the next couple of days.


Materials needed:
-3 washcloths, 2 green and 1 tan
-6 diapers
-Tape
-Toilet paper roll
-Ribbon
-Scissors
-Rubber band
-Cardboard (optional)
-Monkey or other embellishments (optional)


I was actually able make this centerpiece for $1.07
-I have an obsession for washcloths, so I just took three out of my stash for Little Man (never used)
-I already had the diapers, which we won't miss too much since we'll cloth diaper 95% of the time.
-The monkey was from decorations for The Little Man's wall in our room I'm the new place, but I have 7 others.
-The ribbon I had to buy. With tax at the Dollar Tree I spent $1.07. And I'll use the rest of the spool on other baby shower things (coming the next few days).
I did pretty good money wise, didn't I? I'm so proud of myself!

This centerpiece is pretty self-explanatory, so I'm going to try doing mainly pictures and simple captions.


Cut your roll in half length wise. 
Roll and tape.
Tape together.
Roll in the tan washcloth. 
Place cardboard piece inside of green washcloth (do this 2x's). Then roll (not pictured).
Tape together, creating palm tree.
.
Roll 6 diapers and tape.
Rubber band the diapers together. Stick palm tree in middle diaper.
Tape ribbon to hide the rubber band. Add optional embellishments.
Pretty stinkin' cute, isn't he? He was a big hit, too. Sorry for the crappy pictures. And the trashy looking background. I had to create this guy in the living room, which has terrible lighting. And I had things strewn all over the living room so we could get everything out of the kitchen. Oh, well. I'm sure y'all understand. 

Tomorrow is a ribbon corsage. It was my favorite and, after we get settled in better, I'm going to make custom ones and sell them in my Etsy shop